Beginner Art Paintings: What Actually Helps You Start
By Simon I., co-founder, Paint Kit Studio. Published May 25, 2026.
The first time I packed a kit for a customer who described herself as "the least artistic person you have ever met," I assumed she would get stuck on the painting itself. The brushwork, the blending, the bit where you have to keep a steady hand. That was wrong, and it was wrong in a way I have watched repeat a few hundred times since.
People who have never picked up a brush stall on two things that have almost nothing to do with painting. They stall on drawing the picture in the first place, and they stall on choosing which colour goes next to which other colour. Every beginner art tutorial on the internet skips past both of those, because the tutorial is built by a person who already solved them years ago. The phrase "just start with a sunflower" sounds friendly until you sit down at a blank piece of canvas and realise the sunflower is not going to draw itself.
So this is going to be an article about beginner art paintings that takes the long way round. Not "twelve cute subjects, off you go." Instead I want to walk through what actually stops first-time painters, the path through it that I have watched work, and yes, near the end I will get to the list of beginner-friendly subjects too, because that is also useful.
The advice that gets repeated forever, and why it does not work
Open any "beginner painting ideas" roundup and you will get the same three rules. Pick a simple subject. Use cheap paints so you can experiment. Just start, don't overthink it. All three are well-meaning and all three contain a fault line that opens up the moment a true beginner tries to use them.
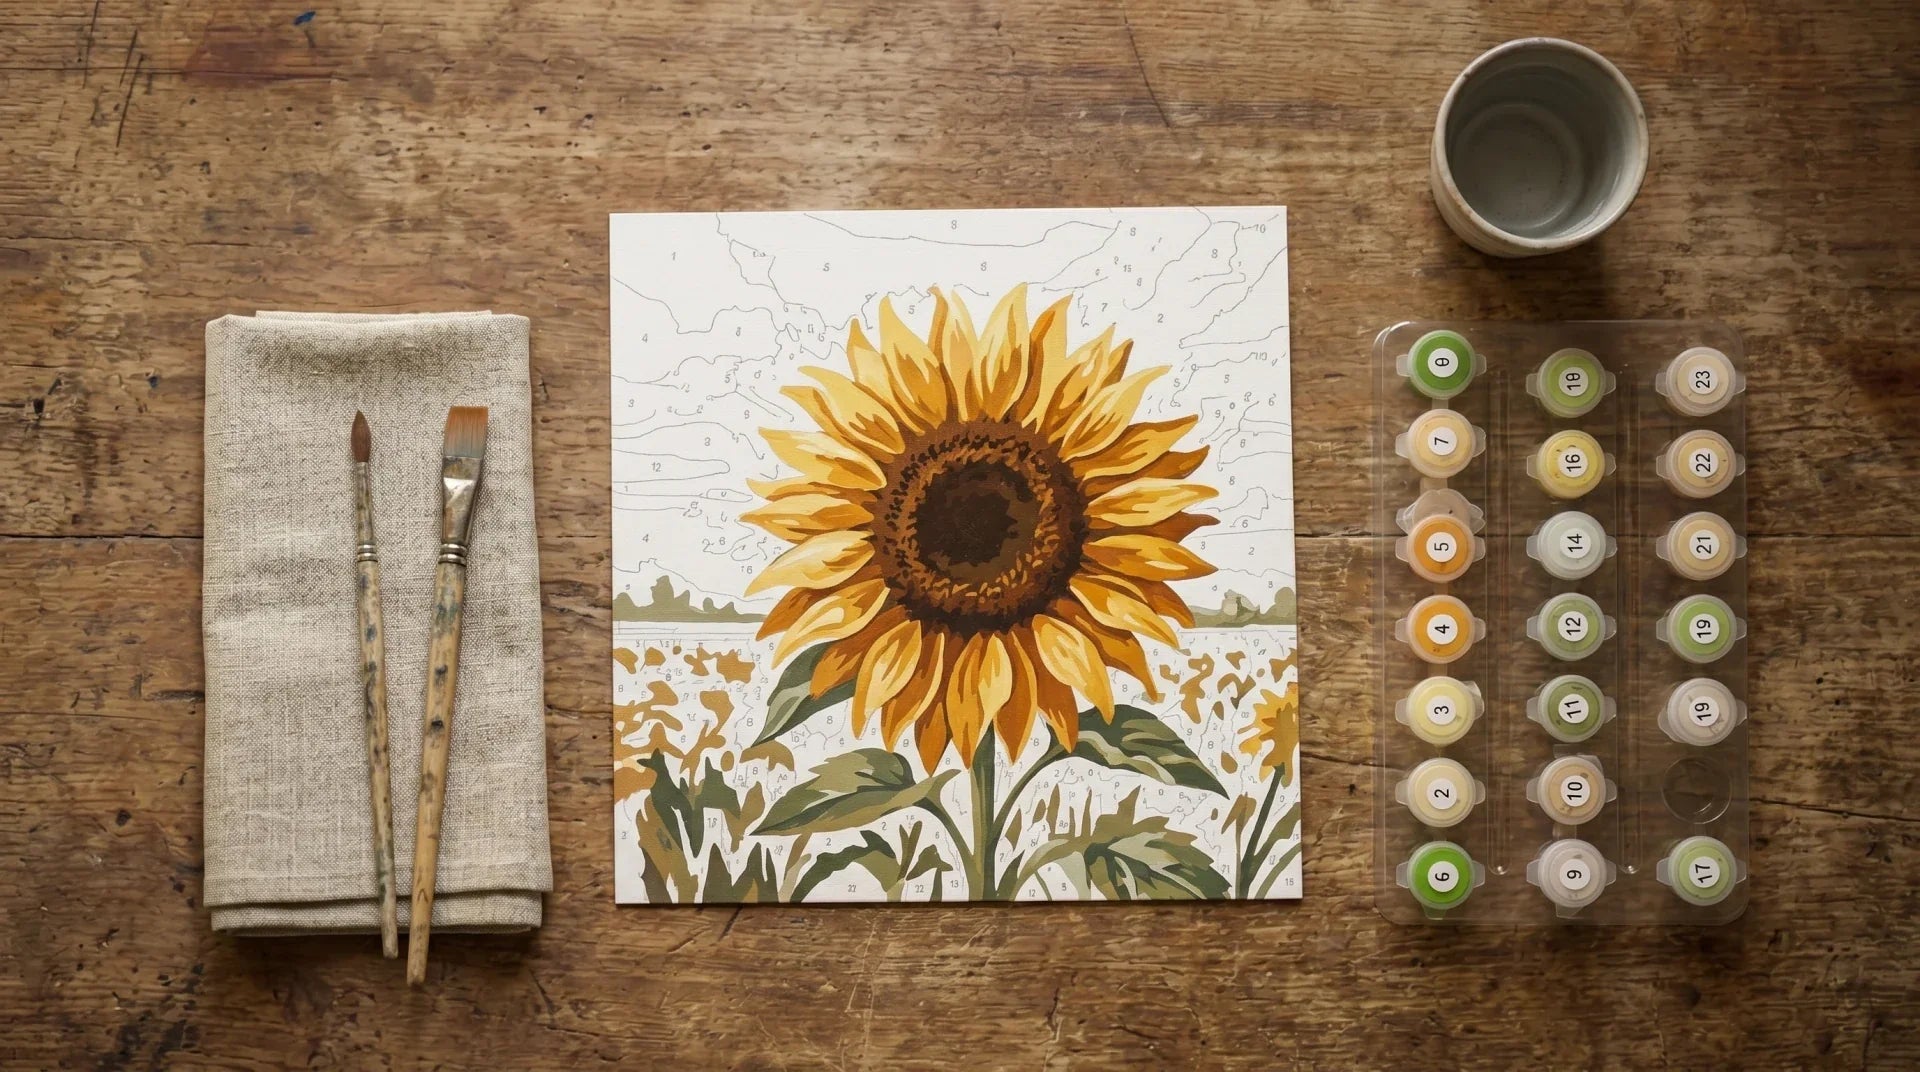
The simple-subject rule assumes you can draw the simple subject. A sunflower with eight petals and a centre disc is simple in the same way a violin is a simple wooden box with strings. The shape is easy to describe and brutally hard to execute. I have a folder on my desk of customer messages that all start roughly the same way. They went to the craft store, bought a small canvas and a tube of yellow, sat down on a Saturday morning, and forty minutes later they were staring at something that did not look like a sunflower at all. Most of them never tried again.
The cheap-paint rule has a different problem. Acrylic itself is a younger medium than people realise. The Smithsonian's Museum Conservation Institute notes that artists' acrylic paint was introduced in the 1950s and was accepted as a viable alternative to oil only after that, which means the painting community has had less than a human lifetime to figure out how to teach it well. The cheapest student acrylics behave less consistently than artist-grade, especially as they dry, and a beginner using them often blames their own hand for what is actually a paint problem. They see a streaky, semi-transparent result and conclude the issue is them.
The "just start" rule does the most damage. What we call painting is really about five separate things happening in parallel, and a beginner is doing all five at once on the same canvas. Drawing the shapes, choosing the colours, mixing the colours, applying the paint, judging when an area is finished. Even seasoned painters will tell you they got good at one skill at a time, not all five together. Telling a beginner to "just start" is telling them to debug five unfamiliar problems simultaneously, on a surface they paid for.
What actually works: pull the variables apart
The thing I have watched work, across the hundreds of customer messages we read in any given month, is also the thing that sounds the most boring on first reading. You separate the skills, work on one at a time, and only stack them back together once each one feels boring. That is the entire trick. The reason it sounds boring is that it does not flatter the beginner with the idea that they can produce a finished landscape on day one. The reason it works is that it respects how anyone learns anything physical.

The skill stack, in the order I would put it, looks like this. First, learn how the paint behaves under the brush. That is its own thing, and you can practise it on a pre-drawn surface where you do not have to think about anything else. Second, learn how colours mix. A pre-mixed numbered kit will give you the answer for that one project, but if you watch carefully you start to internalise which pairs of colours sit nicely next to which, and which pairs argue. Third, learn how to choose composition: where the focal point sits, what stays out of focus. Fourth, learn to draw the underlying shapes loosely from a reference. Fifth, by now you do not need this article and have probably bought your own tubes.
Paint-by-numbers fits in at step one. That is what the original 1950s kits were designed to do. Smithsonian Magazine tells the story of Dan Robbins, the commercial artist who built the format, who deliberately stripped the drawing and colour-decision stages out so that adults with no training could practise the act of laying paint down. By 1954 the company had sold around twelve million kits, almost all to people who had never painted before. The design intent was skill-isolation. It is not the only path in, but it is the path most beginners I see actually finish.
A customer named Carrie left us this review a while ago, and it has stuck with me as the most useful single sentence I have read from a first-time painter. "A tip for first timers like me," she wrote. "Don't be scared to go out the lines. I spent so long doing this only to realise with the lighter colours you have to cover the lines anyway." The thing I love about that quote is not the technical advice, although the advice is good. The thing I love is that she had to paint half a canvas to discover it. No tutorial told her. The kit gave her enough structure that she could afford to find that out for herself, and she now knows it forever.
Eight subjects that will actually teach you something
Right. Now the listicle bit, with the caveat that what matters is not the subject but what each one quietly teaches you while you paint it. I have ranked these in roughly the order I would put a first-timer through them.

1. A single sunflower or floral focal point. The first thing this teaches is how to lay colour next to colour without muddling the boundary. Petals are bounded shapes that overlap a little, so you get edge work without atmospheric tricks. The big shapes are forgiving. The yellow can be a bit off and the painting still reads as a sunflower. If you want a kit version of this, our Golden Sunflower Meadow kit is the one to start with, or the wider flowers collection if you want options.
2. A coastal or Mediterranean scene with a graduated sky. This is where you learn how a sky changes value from horizon to overhead, and how warm light at the horizon line sets the mood of the whole picture. You stop seeing the sky as one colour and start seeing it as four or five. Our Mediterranean Coastal Town kit is built around exactly this lesson, with the sky and water doing most of the work.
3. Cherry blossoms. Cherry blossoms teach restraint, which is a strange thing to need a lesson in. The instinct of a new painter is to fill the canvas. Blossoms force you to leave negative space, because if every branch is crowded you lose the airy feel that makes the subject what it is. The Mount Fuji Cherry Blossom kit pairs the blossoms with a recognisable background, which gives you something to anchor against while you practise pulling back.
4. A mountain or lake landscape with layered planes. Mountains teach atmospheric perspective. The far ridge is lighter and cooler, the near ridge is darker and warmer, and once your eye gets this it is something you cannot unsee in any photograph again. Try Peaceful Mountain Lake or Lakeside Retreat. Either one walks you through the layering without making you decide where each plane sits.
5. A single bird study. Birds are an exercise in how to paint texture without painting every feather. The brain wants to render each feather, the right answer is to suggest the texture with a few directional strokes and let the eye fill in the rest. Colorful Bird Painting is good for this, or the more naturalistic Mallard Duck kit.
6. A sailing ship or lighthouse, anything with straight edges and water. This one is interesting because it builds the muscle for keeping a clean line, which is one of the hardest small skills in painting. Our Sailing Ship kit gives you both the rigid geometry of the ship and the soft fluid water around it, in one painting. You feel the difference between the two modes in your wrist.
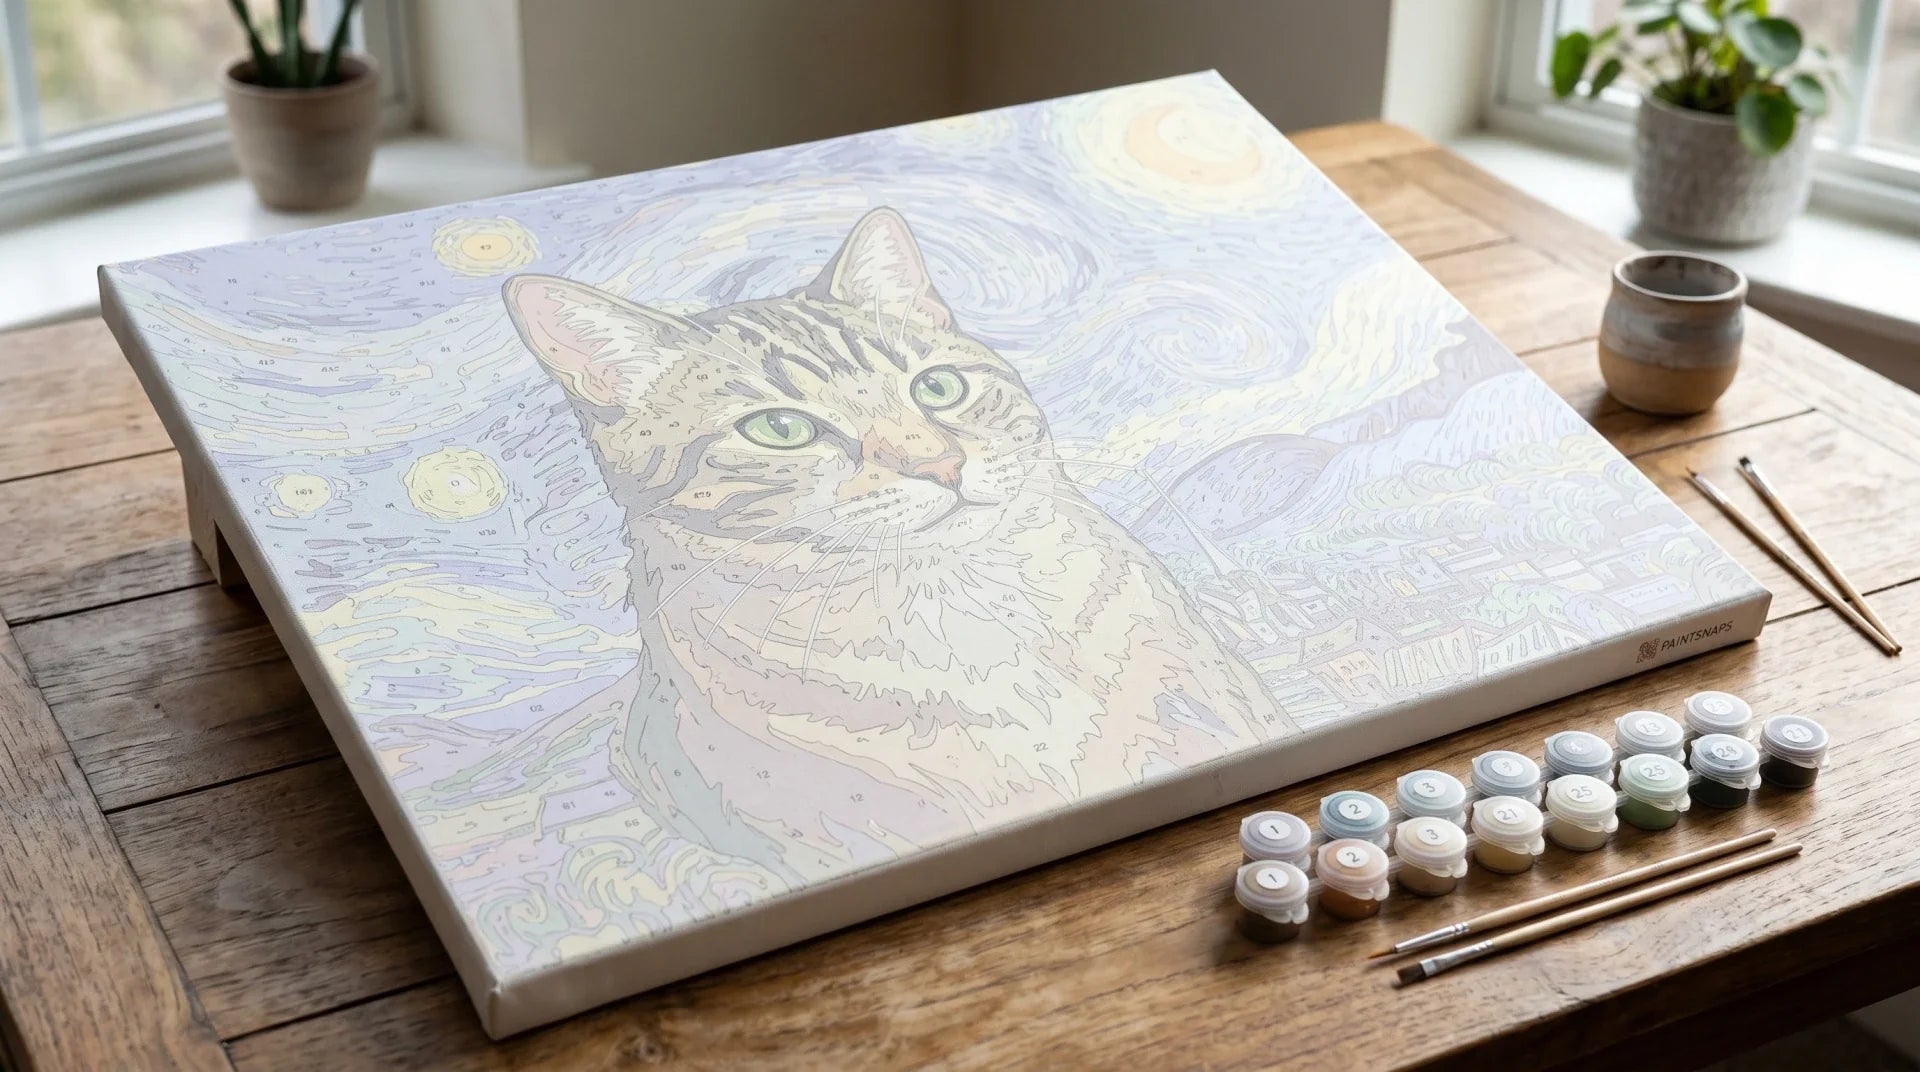
7. A pet portrait, cat or dog. Pet portraits teach you to handle a focal point that is also the emotional centre of the painting. The face is small, the rest is big, and you learn quickly that the face needs the careful work and the rest can be looser. The Grumpy Cat Wine kit is a relaxed starting point, or browse cats or dogs if you want a specific breed.
8. A Hokusai-style wave or any subject with strong repeating curves. This one is for the end of the list because by the time you can paint a Great Wave at a reasonable standard, you are not really a beginner any more. But it is the most rewarding subject to finish, because the moment you get the curl of the wave right, the painting feels like a painting. We have a homage version of Hokusai's print as the Great Wave Painting kit, and there is a longer art-history piece on why that image has lasted if you want to read about it before painting.
How would I actually progress through a year of beginner painting?
If a friend asked me to map out a realistic first year, this is what I would tell them.
Weeks one through four: finish two paint-by-numbers kits at the 24-colour level. Do not buy a third yet. The point is to spend enough time with the brush that you stop thinking about the brush, the same way nobody who has driven a car for a year is still thinking about where the indicators are. You will know you have reached this when you can finish a section of canvas without staring at your hand.
Weeks five through eight: pick a 36-colour kit and pay attention to how the colours sit next to each other. Do not mix anything new yourself yet. Just notice. You are loading your brain with a thousand small decisions that someone else made for you, and they will surface later when you make your own.
Weeks nine through twelve: get a sketchbook and some cheap watercolour pencils. For ten minutes a day, copy the outline of any photograph you like. No paint. Just lines and proportions. This is the drawing skill, and it is the one that nobody warns you needs its own practice slot.
After three months: try a 48-colour kit, and at the same time, try mixing two of the lighter colours yourself to see if you can match the next pot. The kit is now your reference for "what right looks like," which is far more useful than reading colour theory.
After six months: paint something small, six inches by six inches, freehand from a photo. Choose a subject from the eight above that you already painted in a kit. You will be slow and the result will not be your best work, but you will be doing all five skills at once for the first time, and that is the milestone.
This timeline is slower than the internet promises and faster than learning to draw before you paint, which is the other thing some teachers recommend. It splits the difference, and the reason I trust it is that I have watched it work in customer messages over years of running the kits.
The mistakes that quietly kill beginner paintings
A small list of the things I see most often, none of which are the dramatic mistakes people worry about.
Painting under the wrong light. Warm yellow indoor light makes every pot of paint look slightly more orange than it actually is, which throws off your colour choice without you noticing. If you cannot paint near a window in the daytime, get a cheap daylight-balanced bulb. The difference is silly.
A canvas too small to forgive you. Eight by ten inches sounds friendly and is, in practice, brutal. Every wobble in your brushwork is sitting two inches from your eye. A 16 by 20 canvas, which is the size we ship most kits in, hides a lot of beginner mistakes inside larger painted areas. Bigger canvases are nicer to a beginner than smaller ones, and I think that gets the wrong way round in most advice you read.
Buying paint and supplies as if you were already advanced. The artist who is twenty years in needs the good filbert and the cold-press paper. The beginner needs whatever lets them get through the next session. The Smithsonian conservation note about pigment is real and worth heeding, but it does not mean you need to spend $80 on a starter set of artist-grade paints. It means you should not buy the very cheapest student paint either, because it will mislead you about what acrylic is supposed to feel like.
Trying photorealism on the first project. The temptation is to choose a subject because of how impressive it would look if finished perfectly. The right way to choose a first subject is the opposite: pick something where the imperfect version is also fine. Wildflowers, abstract waves, a cat asleep on a windowsill. These all look good with a wide margin for technical error. A wedding portrait or a hyperrealist still life does not.
Quitting between sessions. The painting that gets finished is the painting you can leave out and come back to. The painting that does not get finished is the one that gets packed away in a box on day two. This sounds glib, but it is one of the strongest predictors I have seen of whether a first kit becomes a finished piece. Leave it where you walk past it.
When have you stopped being a beginner?
This is the section I think most articles in this niche avoid, because the honest answer is bad for selling more kits. I am going to be honest anyway. You have stopped being a beginner when you can look at a finished painting, your own or someone else's, and identify three specific things the painter did that made it work. The "I just like it" stage is the beginner stage. The "ah, that is why the sky reads as evening, the warm at the horizon is doing it" stage is the next one.
At that point a paint-by-numbers kit will start to feel restrictive. You will see colours you would have chosen differently, edges you would have painted softer, areas you would have left looser. That is a good moment. It does not mean kits are bad. It means you have used the kit for what it was designed for and you are ready to take the scaffold off.
What you do next is up to you. Some people stay with kits for the meditative quality, which is real. Some people graduate to drawing from reference, which is the natural next step. Some take a class. Any of them works. The thing that does not work, in my experience, is jumping from "I have painted nothing" straight to "I am painting freehand from a difficult reference photo," which is the bit of advice the internet seems weirdly determined to keep giving.
Frequently asked questions
Do I need expensive supplies to start painting?
No. You need a small, structured project that lets you focus on one thing at a time, and a paint that is not the absolute cheapest student grade. Beyond that, every dollar you spend on supplies before you have finished your first painting is a dollar spent on the wrong thing.
Is paint by numbers cheating?
It is not, but I understand why people ask. Paint-by-numbers was designed in the 1950s as a teaching tool, not as a shortcut to looking like a painter. The original creator at the Palmer Show Card Paint Company built it so adults with no training could practise the act of laying paint without also having to learn drawing and colour mixing at the same time. Using a kit is closer to learning piano with both hands by starting with one hand, than it is to faking a finished work. It is a stage. You will outgrow it.
What canvas size should a beginner start with?
Around 16 by 20 inches, which is the size we ship most of our kits in. Smaller canvases punish small mistakes in a way that discourages beginners; larger canvases give you room to work and hide minor wobbles in the larger painted areas.
How long does a beginner painting actually take?
For a paint-by-numbers kit at the 24-colour level, expect somewhere between eight and fifteen hours of total painting time, spread over a few weeks of evenings. For a freehand painting at six by six inches from a photo, expect two or three hours and a result that is honestly not as good as the kit. That gap closes with time.
Should I paint from photos or from life?
Photos, at the beginner stage. Painting from life requires holding a moving three-dimensional scene in your head while flattening it onto a two-dimensional canvas, which is yet another separate skill on top of the five we already discussed. Photos do that flattening for you. Save painting from life for later, when the rest of the stack is steady.
