Paint by Numbers Tips: Getting Clean Lines Every Time
By Simon I., co-founder, Paint Kit Studio. Published 2026-05-06.
Pavel sent me a photo last Wednesday. Half of his finished canvas (the bottom half, a stretch of meadow grass) had crisp lines. Sharp transitions where green met yellow met brown. The other half (the upper sky and trees) looked muddy. Bleeding edges. Colour creeping into neighbouring numbers. He wrote: "Same kit, same colours, same brushes, same painter. What changed?" Easy answer. He had switched brushes halfway through.
This is the most common pattern I see in the photos people send. Clean lines on one part of a canvas, scrappy lines on the rest. Almost always, the cause is not talent. It is technique, and usually only two or three small habits.
This guide walks through the seven habits that produce a sharp finished kit. About 1,700 words. Pour a coffee.
Key takeaways
- Match the brush head to the section size. Big brush in big areas, detail brush for anything smaller than a fingernail.
- Outline first, fill second. Cut a thin clean line of colour around the inside of each section before filling the middle.
- Less paint on the brush, not more. A loaded brush bleeds. A drier brush controls.
- Wait for the neighbouring section to dry. Acrylic skins over fast (within minutes), but two wet sections meeting will smear.
- Hold the brush like a pen, anchor your hand on the canvas. A floating wrist wobbles. A planted hand carves clean edges.
Bottom line: clean lines come from how you hold the brush, what's loaded on it, and what's already dry next door. None of it is talent.
Why do paint by numbers edges look messy?
Three causes, in order of how often they show up in the kits people share with us.
- The brush is too big. A medium brush trying to fill a 1 cm section will overshoot the line every time. The bristles physically cannot land inside the boundary.
- The brush has too much paint. A loaded brush sheds paint as soon as it touches the canvas. Half the bleed problems are solved by wiping the brush on the rim of the pot before each stroke.
- The neighbouring section is still wet. Acrylic dries in two stages. The first is a surface skin, which forms within minutes for a thin layer. The second is full-film coalescence, which takes weeks. Painting wet-into-wet, before the skin forms, lets colours migrate across the boundary line.
The Liquitex FAQ describes acrylic drying mechanism in two sentences. "Acrylic paints dry by water evaporation into the atmosphere and absorption into the surface." (FAQ, Liquitex, n.d., retrieved 6 May 2026.) That evaporation is what makes the surface skin form. The skin is what prevents the next section from bleeding.

Which brush should I use in this section?
Every Paint Kit Studio kit ships with three brushes. Large flat, medium flat, and a small detail round. They are not interchangeable.
| Brush | Use for | Don't use for |
|---|---|---|
| Large flat | Big background sections (sky, water, walls), areas larger than a credit card | Anything with a tight curve, anything next to fine detail |
| Medium flat | Most mid-sized sections after edges are cut, the workhorse for filling | Outlining edges, sections smaller than a coin |
| Small detail (round) | Outlining the inside edge of every section, sections smaller than a fingernail, fine details | Filling large areas (it'll take forever and look streaky) |
The rule. When in doubt, smaller. A small brush in a big section just means more strokes. A big brush in a small section means a ruined edge.

Should I outline the edge first or just fill?
Outline first. Always.
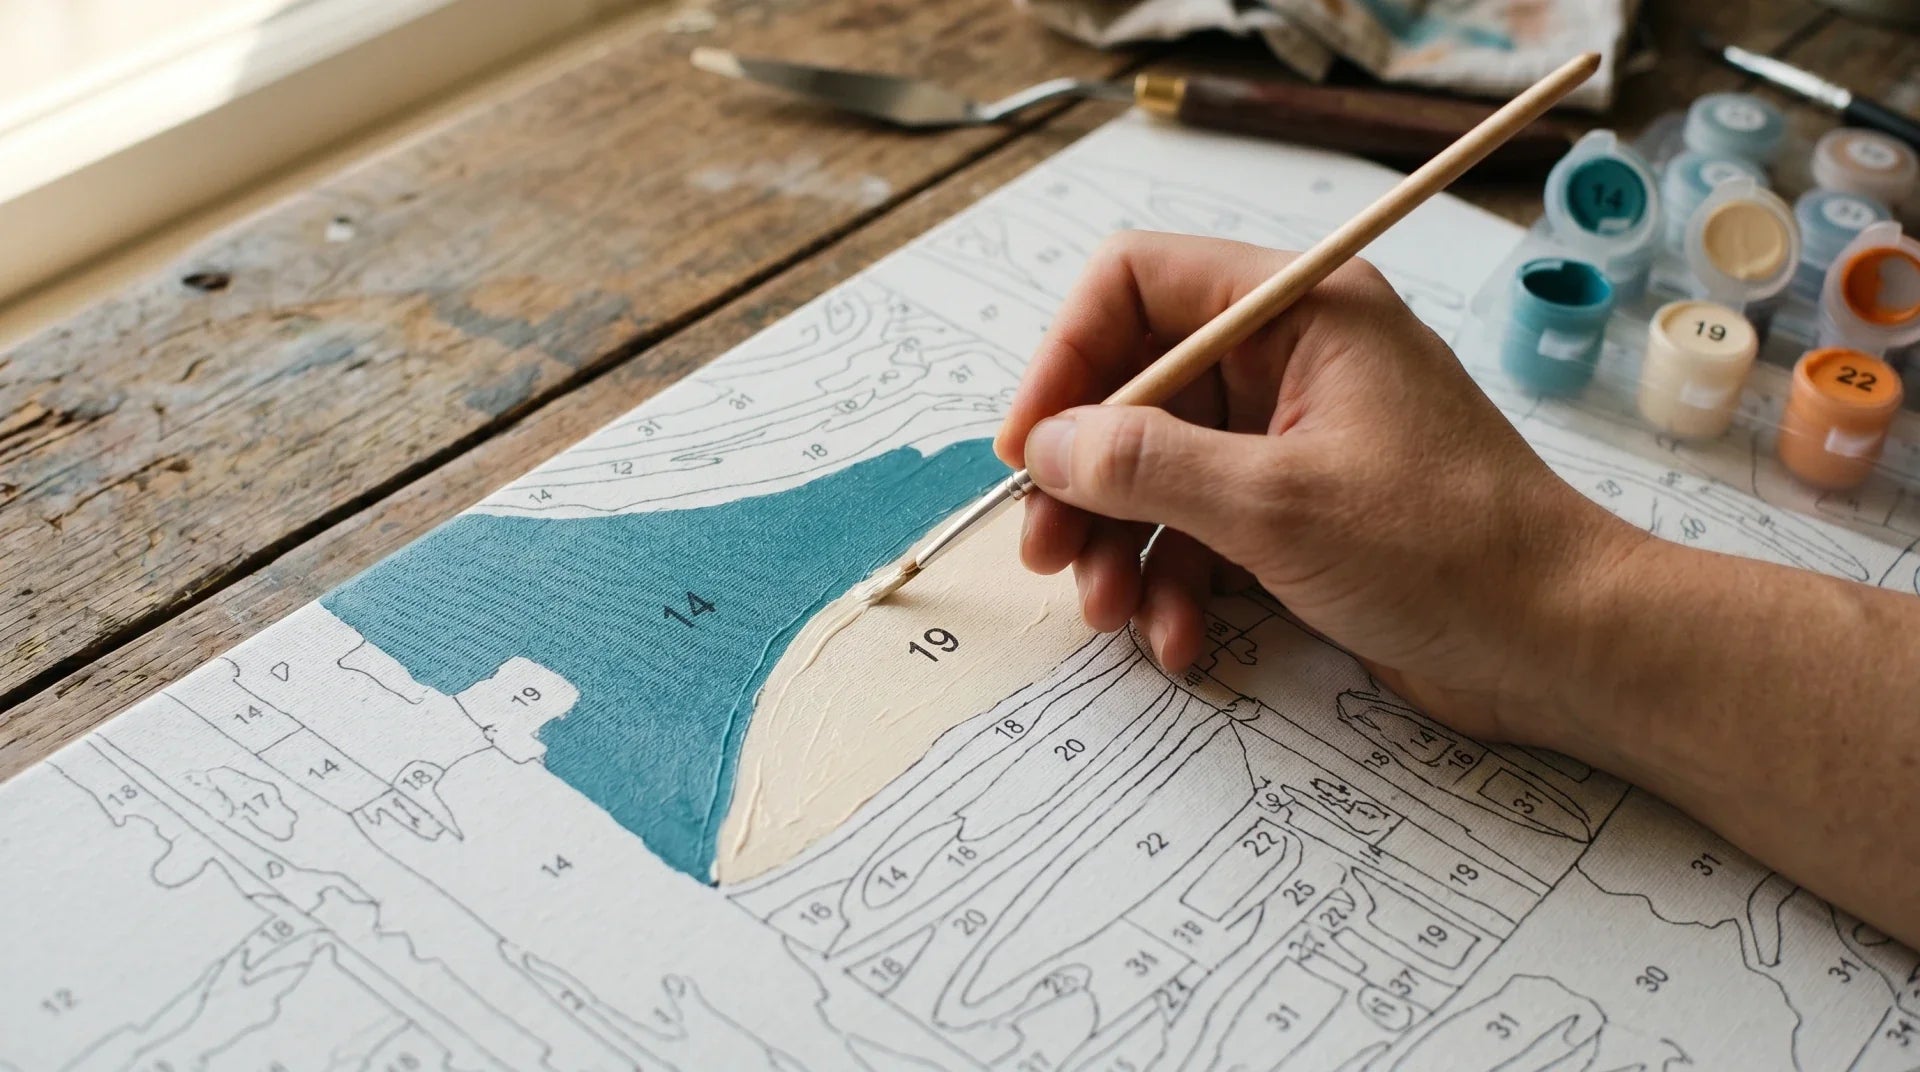
The technique. Pick up the small detail brush. Dip it lightly into the colour. Run it slowly along the inside of the printed line, leaving a 1 to 2 mm band of colour just inside the boundary. Go all the way around the section. Then switch to the medium flat and fill the middle.
Why it works. The outlining stroke is slow, controlled, deliberate. You are watching one boundary at a time. By the time you switch to the medium brush for the fill, you are no longer trying to land the bristles on the line. The line is already painted. The medium brush just paints into a colour that is already there. Mistakes get absorbed instead of broadcast.
Most beginners skip this and go straight to fill with the medium brush. Their fill stroke runs to the boundary, and any wobble at the end of the stroke crosses the line. With outline-first, the wobble happens in the middle of the section where it doesn't matter.
How much paint should be on the brush?
Less than your instinct says.
The test. Dip the bristles into the paint. Tap the brush twice on the inside rim of the pot. Look at the bristles. If you can still see paint dripping or pooling, you have too much. Tap again. If the bristles look damp but no paint runs off, you are at the right load.
The Liquitex FAQ defines viscosity as "paint thickness and flow resistance, influencing brushstroke retention". (FAQ, Liquitex, n.d., retrieved 6 May 2026.) For PBN, you want flow resistance. The paint should hold its shape on the brush, not run off.
One thing not to do. Do not thin the kit paint with water. The Liquitex FAQ is direct on this. "Water is, in fact, the solvent for the acrylic/water emulsion that makes up an acrylic paint. You'll find that you get the best performance out of your acrylics if you make use of acrylic mediums to adjust the working properties of the color. Save the water for clean up." Use the paint as it ships from the kit. If a pot has thickened from sitting open, a tiny touch of water and a stir will recover it. Anything more than that and you are heading away from what the manufacturer recommends.
How should I hold the brush for a clean line?
Like a pen. Not like a stick.
The grip. Pinch the brush handle between thumb and index finger, around 2 to 3 cm back from the bristles. Rest the brush on the side of your middle finger. The pinch should be light, just firm enough that the brush won't twist when you pull a stroke.
The hand position. Anchor your hand. The heel of your palm or the side of your pinky should rest on the canvas itself, or on a sheet of paper laid over the area you've already finished. A floating wrist with no contact wobbles. An anchored hand is steady. This is the single biggest difference between someone whose lines look "professional" and someone whose lines look "first try".
One trick borrowed from sign-writers. The mahlstick. A long stick with a padded ball at one end. You rest the ball on a finished part of the canvas and lay the brush hand on the stick to bridge over wet areas. Cheap version: a wooden cooking dowel wrapped at one end with a folded sock. Free version: a sheet of printer paper folded into a 3 cm-wide strip, laid over the dry part of the canvas as a hand rest.
When should I let the neighbouring section dry?
Always. Or at least, always when adjacent sections are different colours.
The mechanism. Acrylic forms a surface skin within minutes of being painted thinly. Golden Artist Colors describes it like this. "The first stage, a relatively short period of time, results in the formation of a skin over the surface of the paint." (Drying Technical Notes, Golden Artist Colors, n.d., retrieved 6 May 2026.) That skin is what stops the next section from smearing into it. Paint over a still-wet skin and your brush picks up the underlying colour, drags it across the boundary, and you get a muddy interface.
How long to wait. For a thin PBN-thickness layer, a few minutes is usually enough for the skin to set. Touch the edge of the section gently with the back of your fingernail. If the surface feels tacky but doesn't transfer paint to your nail, the skin has formed. Move on to the neighbour.
The workflow trick. Don't paint two adjacent numbers in a row. Hop. Paint one section, then a section across the canvas, then come back. By the time you return, the first section has skinned. This is faster than sitting and waiting, and it keeps you painting.
How do I steady my painting hand?
Three things stack.
- Anchor. Plant the heel of your hand on the canvas (already covered above).
- Brace. Tuck your elbow gently against your ribs. Don't lock it, just rest. This shortens the lever arm of your hand and damps tremor.
- Breathe. Exhale on the long stroke. People hold their breath when concentrating, which adds a slight wobble at the end of the stroke. Exhale slowly through the line. Sounds silly, works reliably.
One more. If your hand is shaking from caffeine or fatigue, paint a different section. Anything that doesn't have a critical edge. Backgrounds, flat areas, places where a wobble will be hidden by the next colour layer. Save the detail work for when your hand is steady.
What if I already bled over a line?
Three options, in order of preference.
- Wait, then paint over. Paint by numbers kit colours are formulated for opacity, so a covered layer hides what's underneath. Let the bleed dry fully (15 to 30 minutes is plenty). Then paint the correct colour back over the bleed. Two thin layers usually fully cover.
- Wipe immediately. If you see the bleed within five seconds of making it, a damp cotton bud (or a clean fingertip wrapped in a paper towel) will pull most of the paint back off. Don't scrub. Roll the bud gently across the bleed.
- Reframe the line. If a small section has gone irrecoverably wrong, repaint the whole section. Acrylic forgives this. The new layer covers the old. (For more on fixing other common errors, see 5 common paint by numbers mistakes and how to fix them.)
The thing not to do. Don't try to fix a bleed by painting more of the wrong colour over the line in the hope that the boundary will end up "somewhere in there". This usually makes the section larger, the boundary fuzzier, and the eventual fix harder.
Frequently asked questions
Why do my lines look great in some sections and bad in others?
Almost always a brush mismatch. You used the right brush in the sections that look clean (matched to size), and a too-large brush in the sections that look rough. Photograph the canvas, look at section sizes, count which brush you used in each. The pattern usually jumps out.
How thin should my outline stroke be?
1 to 2 mm is the target. Wider than that and you've lost some of the section's interior real estate. Thinner than that and the small detail brush is fighting itself. Practice on a scrap piece of canvas (we ship a small test square in every kit) to find the right pressure.
Can I use a magnifying glass for tiny sections?
Yes. A craft headband magnifier ($15 to $30 on Amazon) at 2x to 3x is what most of our older customers use. A desk magnifier on a swing arm works too. The magnification doesn't make your hand steadier but it makes the line you're trying to follow visibly larger, which lets your normal hand control get the job done.
Should I work top to bottom or bottom to top?
Top to bottom is conventional, mostly to keep your wrist out of wet paint. But the more important rule is "dark first, light second" within whatever direction you choose. Dark colours hide most overpaint mistakes, so painting them early gives you a margin to clean up edges with the lighter colours afterward.
The lines on the printed canvas are still visible after I paint. Is that a problem?
Common, and almost always fixable with a second thin coat of the same colour. The printed numbers and outlines are designed to be covered by the kit's paint, but a single thin layer won't always block them. Wait for the first coat to dry (15 to 30 minutes), apply a second thin coat, and the lines disappear under the paint film.
Ready to paint with sharper lines?
If you're starting your first kit, our Complete Beginner's Guide to Paint by Numbers walks through the rest of the workflow (setup, finishing, hanging) in detail.
For practice, the most forgiving categories are Animals and Flowers. Organic shapes and soft colour transitions are kinder to imperfect edges than geometric cityscapes or portraits. Once you've built up clean-line confidence, Cities & Villages and Portraits reward the technique.
For an anchor piece in a room, larger formats (50x70 cm and above) in the Seascape or Mountains & Lakes ranges work especially well. Once your kit is finished, our guide to framing your finished canvas covers the four options for getting it on the wall.
You can also turn a personal photo into a custom kit, which is what most of our repeat customers do for their second or third painting once their technique is dialled in.
Browse the full paint by numbers collection to find your next canvas.
These habits pay off most on the bigger, more detailed adult paint by numbers kits, where there is far more fine edge-work to keep crisp.
Last updated: 2026-05-06.
%20had%20crisp%20lines.%20Sha...)